[Nearly] Zero Waste Kitchen: Whole Wheat Sandwich Bread

[Nearly] Zero Waste Kitchen: Whole Wheat Sandwich Bread

For the month of January, I’ve been avoiding added sugar, which is a LOT harder than it may sound. Though I thought I already knew most of the culprits hiding sugar, I have discovered a few more places that I was unaware of.

Sneaky Sugars

For instance, sriracha has sugar. That might be common knowledge for people who eat sriracha regularly. I just thought it was like any other hot sauce, until I tasted it. It was so sweet that I had to check the label.

Sure enough – sugar is the second ingredient.

Though, the real conundrum is how they manage to put “0g added sugar” on the nutrition label…????

🤷‍♀️

I don’t know what that’s about, but I decided not to take any chances and switched back to my regular hot sauce [Tapatio, at the moment] which has no sugar.

I also happened to be in the market for a new multivitamin and I thought I would give gummies a try [they are so dang popular after all], but I decided against it when I realized that they have added sugar.

These are the gummy vitamins that my kids take every day. They prefer gummies for obvious reasons [and truthfully, the sugar content is nominal], but they also like Flintstone chewable vitamins, and these don’t contain any sugar.

Sugar in Bread

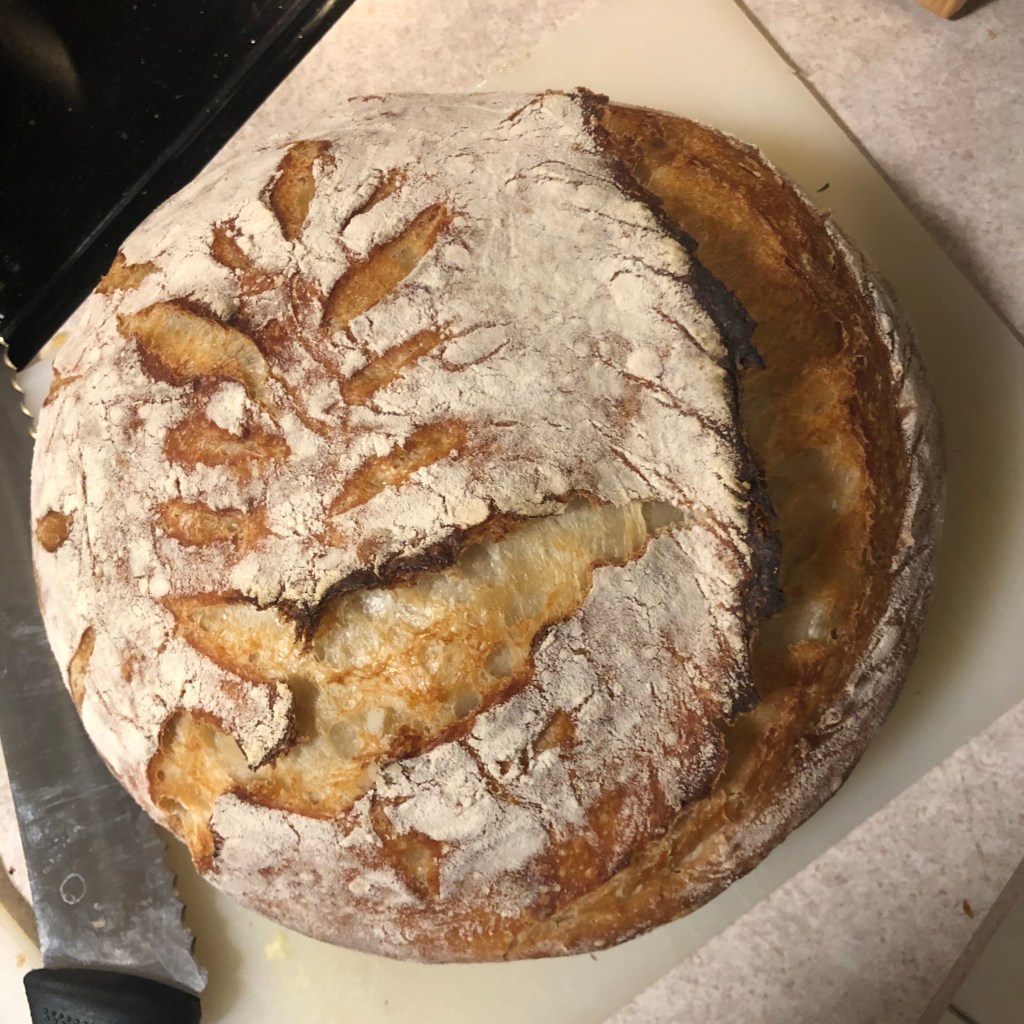
By far the sneakiest place to find added sugar is in bread. It is very challenging to find bread in the grocery store bread aisle that doesn’t contain any sugar. It’s not impossible, of course, so if you really want to buy your bread, I recommend looking in the bakery for freshly baked loafs that only have the four necessary ingredients: flour, yeast, salt, water.

Obviously, if you want a sweet bread [such as zucchini bread] or even an enriched bread [such as brioche], then you can expect to find sugar in the ingredient list – but for every day, run-of-the mill sandwich bread and buns, sugar is unnecessary.

So, I’ve been making my own for years.

It all began when I experimented with giving up processed foods for a month. I was pretty new to baking at the time, but I had to find a bread recipe that I could actually make that would work for sandwiches – that was also 100% whole wheat. It took me quite a while to find one that worked for me, but now I’ve been using the same recipe for the past five years to make everyday bread for my family.

The base recipe is from An Oregon Cottage [you can find the recipe here]. Over the years, I’ve altered the recipe to suit my needs — namely removing the honey and swapping two cups of whole wheat flour for bread flour, which makes a slightly fluffier bread.

So, here is the recipe that I use [and it’s in my preferred format which is with ingredients listed in bold in the instructions].

Whole Wheat Bread Recipe

This recipe makes two loaves and takes me 2 hours to make [1hr and 20 minutes of that is rise time], but I’ve been making it every week for years, so maybe plan on 2.5 hours.

1. Put 2 1/2 cups warm water [about 110°, but don’t stress it – just not so hot it can burn you] in a large mixing bowl. Sprinkle 1 1/2 tablespoons active dry yeast over the water. Add 2 cups bread flour. Mix until incorporated. Wait 10-20 minutes [the mixture should rise and get foamy on top].

Before 20 minutes
After 20 minutes.

2. Add 1/3 cup olive oil [or any neutral oil], 4 cups whole wheat flour, and 2 1/2 teaspoons salt. Stir until it becomes too thick, then turn out onto a floured surface and knead by hand until smooth, adding additional flour as needed to keep it from being too sticky.

My kids love to get it on the kneading.

3. Divide dough in half. Take one half and flatten, then roll up and pinch together. Curl up ends and pinch together. Place seam side down in oiled bread pan. Repeat with other half of dough.

4. Cover with a towel and let rise for one hour [preferably in a warm place].

Before the rise
After rise

5. Preheat oven to 350°. Bake for 40-45 minutes.

And voila! Enjoy that freshly baked bread smell! Mmm…

🍞 🍞 🍞

Karis

[Nearly] Zero Waste Kitchen: Homemade Croutons

[Nearly] Zero Waste Kitchen: Homemade Croutons

Every week I bake a lot of bread, which means that we inevitably have some dried out, day-old bits. I do my best to bake only what we need and eat everything I bake; however, life happens. BUT it doesn’t have to be wasted.

Now, I’ll be the first to admit that there is no shortage of great options for using up day-old bread, but in my house, croutons are the favorite because they are so quick and easy to make and my children LOVE them.

Before I tell you how I make the croutons, here are some other ways I use up old bread:

We’ve done all of these things at one time or another, but croutons are my favorite because they can be made in just a few minutes and thrown on soup or salad [my two favorite food groups].

I actually learned how to make croutons from my brief stint as a bakery associate at Panera bread about thirteen years ago. Did you know they make their croutons in store? [At least they used to.] And Panera has the BEST croutons.

Croutons can be made on the stove top or in the oven. [The Panera method is in the oven.]

Stove top croutons

Cubed two-day-old sourdough bread

To make croutons on the stove top, just heat up some oil in a skillet, cube and season your bread, then add to the skillet and toss occasionally until brown and crispy on the outside.

You have to watch them so they don’t burn, but it only takes a few minutes – maybe 3-5.

I season them with literally whatever I have on hand. Usually some version of garlic salt and then a green herb like oregano or thyme, but I’ve been known to get funky and throw smoked paprika on them [I put that sh*t on everything]. Just plain ol’ salt and pepper works great too.

Oven baked croutons

Cubed day-old whole wheat bread ready to go in the oven [and you can spy my homemade veggie soup simmering too]

The process is very similar with baked croutons. Cube the bread and toss with seasonings and olive oil, then spread on a baking try and bake at 350° for roughly 7-10 minutes. I usually toss them once to get them crispy all over.

No matter how you make them, they are delicious!

Perfect for fall soup season! Add croutons to the list of things you’ll never need to buy again.

😋

Karis

Simple Vegan Sweets

Simple Vegan Sweets

As a vegan, I don’t miss the meat nearly as much as I miss the sweet stuff: ice cream, brownies, cake, buttercream!

😩

But, don’t worry. I wouldn’t let veganism stand in the way of my sweet tooth. So, today I’m sharing with you my three favorite homemade vegan sweets. These treats are so easy to whip up and only use a handful of natural ingredients.

Vegan dessert options are still pretty rare and/or pricey. So, if I want a vegan dessert, I have to make it myself, unless I want to pay $5 for a pint of dairy-free, calorie-bomb ice cream [which, I’ve definitely done] or some other specialty vegan product. But the truth is, making sweets myself is more rewarding and also free of all the additional junk in processed foods.

These three desserts require very few ingredients and varying degrees of effort. Let’s start with the easy one.

Easy: Vegan No-Bake Brownies

Forgive my terrible photos. I’m clearly not a photographer.

Brownies are pretty much the best things ever baked [in my opinion, anyway], which makes these vegan no-bake brownies the best things ever…not baked. They aren’t an exact replica of a traditional brownie, but they are really frickin’ good! They are nutty, gooey, chocolatey, and that ganache is the perfect sweet topping.

The ingredients for the brownie bit are: walnuts, almonds, dates, cacao powder [or cocoa], and salt. You basically throw everything into a blender under it gets all gooey and then press it into a dish and refrigerate. [I’m oversimplifying a teensy bit, but that’s the gist.] Doesn’t get much simpler [or natural] than that!

[Actually it does get simpler, if you read on to the next recipes, but never mind that for now.]

The ganache has almond milk, dark chocolate chips [I always buy the allergy friendly or certified vegan chocolate chips], salt, coconut oil, and powdered sugar.

The recipe is from the Minimalist Baker, and you can find it here. I don’t change anything, except I once swapped the walnuts for pecans and they were still delicious.

Side note: these are a pricey dessert to make due to the nuts and dates – but totally worth it! They are also high in calories [because nuts have a lot of good fat]. I’m a strong believer in the idea that if I put in the work to make something from scratch, then I deserve to enjoy the fruits of my labor guilt-free. [Though I still limit the quantity.] Whereas, buying an overpriced, mystery-ingredient-filled vegan dessert from the grocery store just isn’t as satisfying.

Easier: Vegan Coconut Macaroons

Forgive my terrible nail polish. I’m clearly not a hand model.

Not to be confused with macarons [which can also be made vegan, but would never, ever by any human being be described as easy], these vegan macaroons are little bits of coconut and chocolate heaven. Of course, I love coconut. If you don’t like coconut, just skip down to the next sweet treat [but know that you’re missing out on all the goodness that coconut products offer to us vegans].

Most vegan macaroon recipes call for aquafaba, which I always have, but never feel like using because it requires all that beating. It’s quite time consuming. I wanted something simpler than that…and I found it.

Over at mindfulavocado.com, Amanda provided a super simple macaroon recipe, which I now use to satisfy all my coconut cravings. You can find the full recipe here, but I did modify this one to make it even more simple. Basically, all I do is mix together sweetened coconut flakes [you could pulse in a blender to make them finer, if you prefer], almond flour, maple syrup, a pinch of salt and enough almond milk to make it come together into a thick “batter” of sorts. Then I spoon it onto my silicone baking mat in little ball shapes and bake them at 275° for about 30 minutes [sometimes longer, check frequently.] Then once they are cooled, I dip and drizzle with melted dark chocolate chips.

That’s it.

And they are so good. Slightly chewy, slightly crispy, with the touch of dark chocolate.

😋

Easiest: Vegan Peanut Butter Cups

I made these for Easter, which is why they are shaped like eggs. Or at least, they were supposed to be shaped like eggs…

No matter what shape you prefer, these are sooooo good. And quite frankly, I don’t know why everyone else puts butter and vegetable shortening in them!!! Why complicate matters when you can make these with three ingredients and like two minutes [excluding freezer time]?!?

So, there is no recipe for these treats – which, by the way, are my absolute favorite. It’s too simple for a recipe.

All you need is peanut butter, powdered sugar, and chocolate chips.

Some side notes about these ingredients:

1. The peanut butter needs to be natural peanut butter. And, by that, I mean that the only ingredient in it is peanuts [and maybe salt] – that’s it! No one should be eating that weird oily smooth peanut butter that Jiff is selling anyway. What the heck is that stuff? It’s definitely not peanut butter. But, anyway, I digress. I make my own peanut butter using peanuts and a blender [Ninja], but you can find a jar of natural peanut butter at the grocery store you just have to read the label. Many jars say “natural” and they still have sugars, oils, and god knows what else in them.

[Ok, sorry about that. I’m passionate about peanut butter.]

2. Chocolate chips should be vegan if you are vegan, but if you are not vegan you can use any chocolate chips you want and you will still LOVE THESE PEANUT BUTTER CUPS! I mean, I have yet to meet a human who doesn’t like chocolate peanut butter cups. [Obviously, a peanut allergy will prevent some people from having these…and I am just so so sorry.]

Now, all you have to do is put some peanut butter in a bowl and mix enough powdered sugar to get a thick-ish consistency [there is no right or wrong here]. Then shape however you want and put in the freezer to harden. Then dip or roll or drizzle or coat in melted chocolate chips. Once set, enjoy!

If even that sounds like too much work, look, just put some peanut butter in a bowl, mix in some powdered sugar, and sprinkle in chocolate chips…then go sit on the couch and watch Netflix. Okay?

Sometimes that’s all I’ve the energy for myself.

🤷‍♀️

No shame in my game.

Footnote about eating sweets:

Now, one last thing. I am an obsessively healthy eater, so you may be surprised to see me promoting sweets. But, the truth is, being healthy does not mean that you can never have dessert again [and being vegan definitely doesn’t mean you have to deny your sweet tooth]. We just have to level up our treats. We need to be eating occasional desserts in reasonable [aka small] quantities that contain natural, and healthful ingredients.

That’s it!

I don’t eat these things every day. Truthfully, I eat a sweet treat about once a week at the most. That’s enough for me to feel like I’m not depriving myself.

Food is fuel, but that doesn’t mean we can’t enjoy it too.

And I hope you do enjoy these recipes! If you try one out, let me know! And you can also tag me in a photo on Instagram @no.makeup.mama – though, fair warning, I’m not on social much.

🍮 🍨 🧁

Karis

[Nearly] Zero Waste Kitchen: Sourdough Discard Crackers

[Nearly] Zero Waste Kitchen: Sourdough Discard Crackers

Now that I’ve been on the sourdough bandwagon for a while, I’ve been anxious to find creative uses for the extra sourdough starter I accumulate from feeding it daily [usually called “discard”]. There are lots of ideas out there, but they never interested me much until I stumbled upon the easiest, simplest sourdough cracker recipe EVER. And so, of course, I want to share it with you, on this most special Super Bowl Sunday, because it is a great snack for a game day, for a party day…or for any day really.

Now, I know what you may be thinking, I’ve seen millions of these sourdough cracker recipes! And I totally agree with you. They are all over the interwebs right now – but, I promise you, this is the simplest recipe. I know because after I found this recipe, I lost it and it took me forever to find it again. Every other recipe I looked at had other ingredients like butter, rye flour,sesame seeds, etc. I couldn’t find a single other recipe that just had four ingredients: flour [any kind], sourdough starter, oil, and salt.

So, if you’re going to a party [which you SHOULDN’T BE – ahem, Covid!] or if you’re throwing a party [don’t even THINK about it!], or you’re doing like us, and pretending it’s a special occasion while sitting in your own living room watching the game by yourself, these crackers make a great snack.

If you don’t currently have a sourdough starter, get yourself one! It took me a long time to find one [without ordering one online], but I realize now that I have lots of friends who have them and all I had to do was ask! Sourdough bread is so delicious and simple to make [albeit time consuming] and only requires a few simple ingredients and is quite impressive to serve at your next family get together [after COVID, of course!].

I mean, who doesn’t want to say that they baked a sourdough boule [which is just a fancy French word for “ball”]?

I’ve even started attempting fancy scoring patterns. My latest attempt:

Eh, needs some work….

Anyway, on to the crackers.

The sourdough discard cracker recipe [which seems too simple to even qualify as a “recipe”] comes from Bon Appetit [You can find the original here.]. But I will summarize and add my own tips and modifications for you.

First, combine 1 cup flour [any kind] with 1 cup sourdough starter [ripe or not], 1/4 cup olive oil, and 1/4 tsp salt [or more]. I have used all purpose flour, whole wheat flour and a mix of the two – all with the same delicious results.

Next, mix until the dough comes together and isn’t sticky to the touch. After a few seconds of mixing, the dough becomes smooth and elastic. It isn’t dry, but you can touch it with your finger and it’s comes away clean. This far, every time I’ve made these crackers I have had to add a little bit more flour [just a sprinkle] to get the right consistency.

Then, take a portion [I usually pull about a fifth] and roll it out on a silicone baking mat [or parchment paper if you don’t have a reusable baking mat – but then go buy one!]. No flour needed. The dough should not be sticky [thanks to the oil]. I don’t even flour my rolling pin. The key: roll it thin. I roll mine so thin that I can almost see through them. This is important if you want a crispy cracker [and, I mean, who really wants a chewy cracker???].

Next, cut into crackers shapes with a pizza roller, prick each cracker with a fork, and top with salt and/or seasonings. I use a flaky salt or garlic salt.

Finally, pop in a 350° oven for roughly 15 minutes. I put mine in for exactly 16 minutes, but every oven is different, so some experimentation may be necessary. You’ll know when they are done because they will all turn a uniform [and lovely] golden brown.

[Obviously, repeat the last three steps until you’ve used up all the dough.]

👍

This recipe yields at least five dozen crackers when I make it [usually closer to 100], but I’m not much of a perfectionist, so the sizes are all different and sometimes wonky…so, I don’t promise a certain amount of crackers. BUT I do promise that they will be yummy!

Different colors indicating different baking times, as I experimented with getting the perfect crispy cracker.

Great dips include hummus, guacamole, salsa, peanut butter – or just eat plain, by the handful!

Anyway, I hope you give it a try!

Happy snacking!

😋😋😋

Karis

Homemade croutons

Homemade croutons

When I’m reaching the end of my homemade bread loaves, I usually have some dried ends hanging around because of the shape of my loaf pans. Rather than let these go to waste, I use them to make croutons.

I originally got the idea from back in the day when I worked for Panera. Did you know that they make their own croutons out of their freshly baked bread? Well, at least that’s how they did it ten years ago…

Anyway, nowadays I do the same thing when I’m looking for ways to use the bread before it goes bad.

It’s SO simple and a great zero waste option if you love croutons as much as I do.

How to make your own croutons:

  1. Cube the bread.
  2. Add enough oil and seasonings to coat lightly. [I use the same seasoning mix I use for my homemade salad dressing here, or you could use regular Italian seasoning.]
  3. Spread on a baking sheet and bake at 450° for roughly 8 minutes, shaking the tray once to stir. [Time will depend on how dry the bread is to begin with, so watch closely.]
  4. Enjoy in soups or salads or, as my kids like to have them, as a crunchy snack.

For dinner tonight I had day old bread that needed to be used up, so I made grilled cheese sandwiches and used the ends of the loaf to make these croutons to top squash soup which my Auntie Paula had given us.

Mmm-mmm. Delicious.

Karis