July Shopping Audit [and my new work boots]

July Shopping Audit [and my new work boots]

July was a crazy month. I started my two new jobs and felt like I was working ALL THE TIME. I’ve also been preparing homeschool curriculum and gathering resources, books and materials. And I volunteered 12 hours to the food bank in June, packing meals and working at a pop-up drive through food pantry one Saturday morning.

Now that we don’t have Brett’s full-time income [and my part-time income is measly in comparison], I have been thinking about money more than usual. Unfortunately, it turns out that homeschool curriculum is not cheap and that getting a new job means buying appropriate work boots. So, we spent some money.

However, a small mercy came in the form of a bag of clothes diapers that a girlfriend offered me literally a day after I told Brett that I need new ones because I cannot seem to solve the diaper rash problem we are now experiencing with our fourth baby. The same friend also gave us a bigger bike for our son who has completely outgrown the little twelve inch bike he currently uses, which my sister-in-law found for him at Savers for $2.

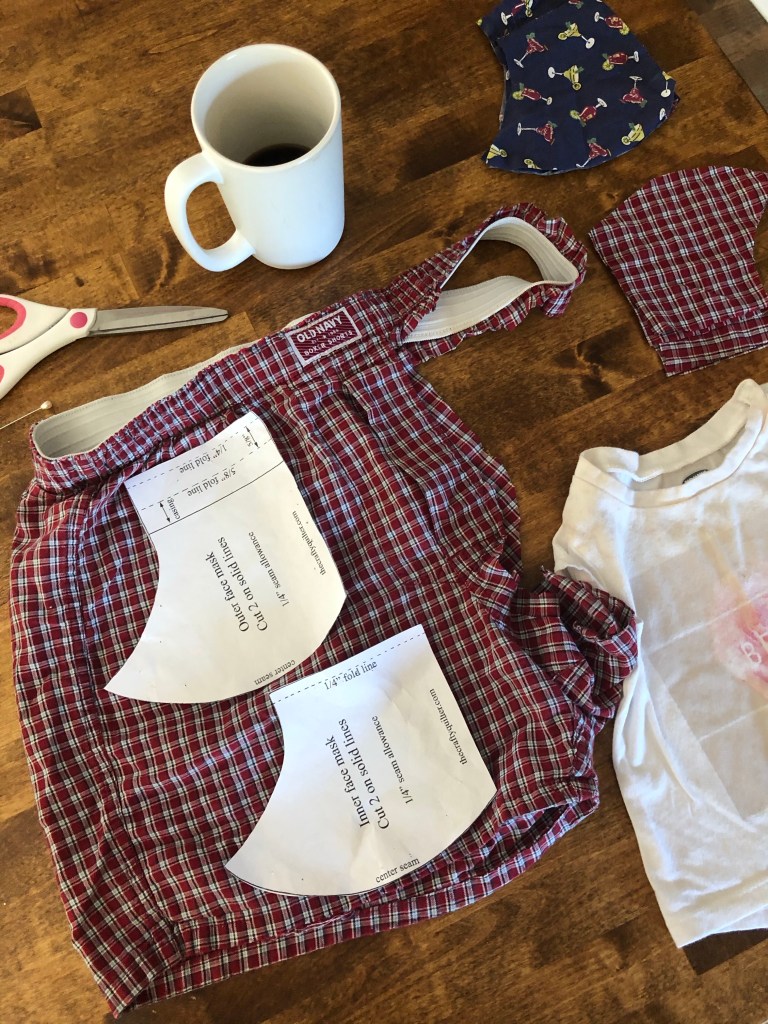
I already mentioned in my previous update post about making masks for the family which kept me from having to buy any.

Yes, I made them out of old boxer shorts. 🤫

I have also inherited a new sewing machine which is perfect timing because [though I’ve grown quite fond of my little $20 machine] there is more I would like to make and I needed a bigger machine.

This machine also serves as a reminder of our Nana who passed away last week.

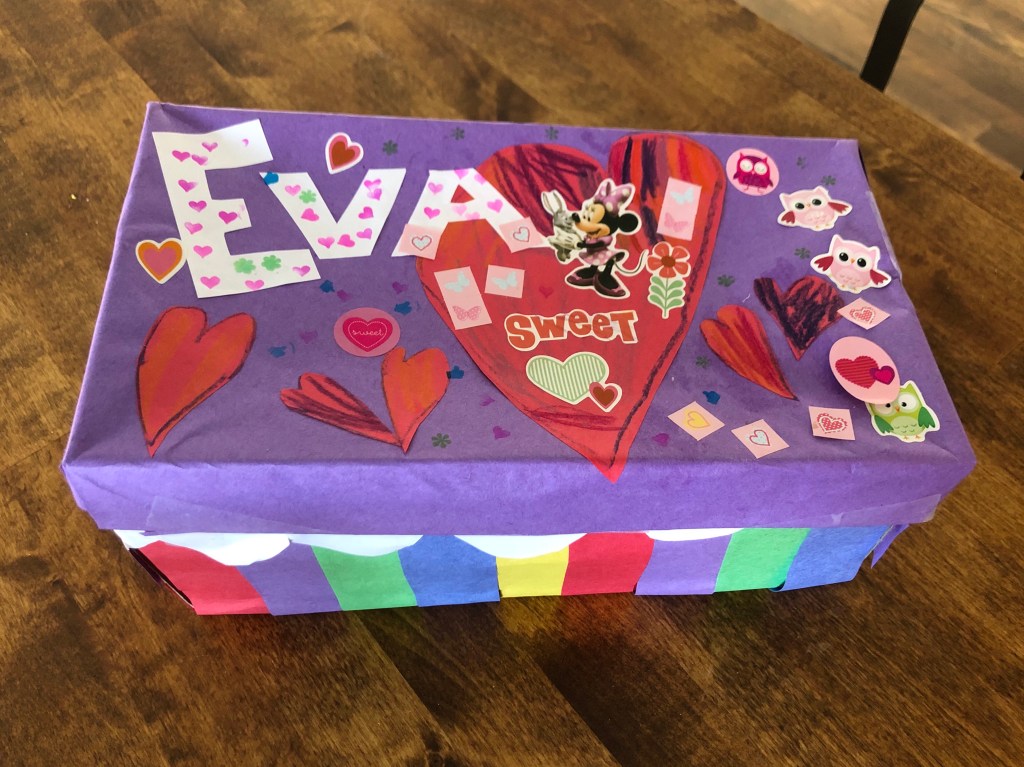
This month was Evangeline’s sixth birthday [!!!] and she told us that she really wanted roller skates. We stumbled upon a pair of adjustable roller skates at Goodwill [while looking for work boots]. And we picked up a pair of used knee and elbow pads for her [that also came with a bike helmet that is perfect for my younger daughter] from a neighbor [I love OfferUp!].

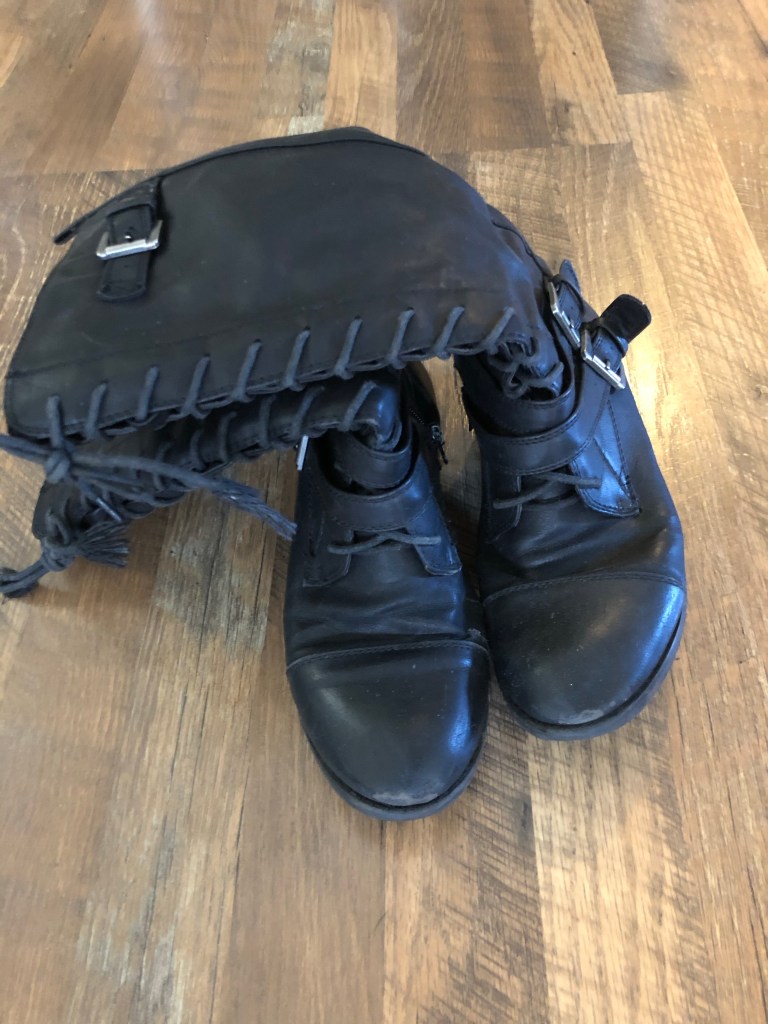
I was really stressed about finding work boots because I had to have them in less than a week for my start date and I didn’t want to spend $200 on a new pair. But with just one day left, I was able to find a used pair of steel-toe work boots for $20 that fit perfectly. In my previous life I would have run out immediately to the closest shoe store and bought whichever pair was my favorite. But these days, our new values [which include: intentional living, minimalism, and waste reduction] keep me from making impulsive buys. And I am so glad. Now, even facing a job loss, we are not worrying about money.

So, it may seem that we’ve hit a rough patch financially, but, as always, the universe takes care of us.

What we bought

Roller skates for Eva’s birthday ($5): I’ve written several times already about how and why we give used gifts to our kids. Evangeline didn’t care at all that these were used and they are adjustable so she can wear them for years.

Shoes for Brett ($6): Brett didn’t need shoes urgently [especially since he’s out of work], but while he was in Goodwill looking for work boots for me, he also found himself a pair of brown dress shoes to replace his worn out pair. These shoes are in perfect condition and are apparently very expensive new. Maybe will start shopping at Goodwill more often!

Bell and streamers for Eva’s bike ($19.33): We couldn’t find these used so we bought them from a locally owned bike shop in town.

Knee and elbow pads for Eva ($10): I was so glad to be able to find someone selling these used pads for Evangeline to use with her roller skates [a tough skill to master, turns out].

Work boots ($20): Took a while to find them, but they’ve been working great since I started my job three weeks ago.

Shampoo and conditioner bars ($27): I usually buy Lush bar products, but this time we went back to Ethique, whose bars are cheaper per ounce. It may seem pricey, but our last shampoo bar lasted four months and the conditioner bar is just now almost gone and it’s been nine months. Ethique’s website states that one shampoo bar replaces eight bottles of shampoo.

School curriculum for Eva – minus math ($113.05): I went with a digital download curriculum to cut down on the cost. The program doesn’t include math, however, so I had to buy a separate math program.

Math curriculum ($92): I bought just the teachers edition and student workbooks [no manipulative or resources] and it was still almost $100! I know their are cheaper options out there, but I really need more direction than professional homeschool moms.

Our new budget is to spend as little money as possible – so I guess we went over budget this month. But, overall, we did pretty well. We still spent money, but we bought mostly used and did our homework to find the most ethical purchasing option available.

What We Gave Away

Nothing.

🤦‍♀️

We have set aside a collection of maybe twelve kids utensils that we no longer need, but we haven’t even had the chance to donate them.

Maybe next month…

Hope everyone is doing well and staying healthy!

Karis

Carlson Coronavirus Update [and our trip to the zoo]

Carlson Coronavirus Update [and our trip to the zoo]

Life has changed A LOT since I last posted an update about my family. My partner was laid off at the end of last month. I am now working two additional part-time jobs [on top of personal training, which has been painfully slow due to everyone’s understandable hesitation to return to the gym]. I have officially withdrawn my daughter from the public school system and began plans to homeschool her and my son [who would be in preschool].

We are not moving now. At least, not until Brett finds a job – which may take us far away, or we may stay here. Who knows.

🤷‍♀️

This is a very strange time of uncertainty for my family, but I’m actually really excited. I’m excited about the opportunity to work more away from home [stay-at-home momming was never my calling]. I’m excited about the possibility of moving to a new place. I’m excited about teaching my kids at home with a hands-on, literature-focused approach that you just can’t find in a traditional classroom. And I’m excited about all of the time we’ve been able to spend as a family enjoying the sunshine this summer.

We even went to the zoo yesterday, which was so strange with everyone in masks and all of the pathways marked with one-way arrows – but the animals were totally oblivious to how crazy our world has become.

Because masks were required at the zoo, I had to make masks for the whole family. I used some old clothes that I had been hanging onto as scrap materials and my little $20 portable sewing machine. Despite that [and my total lack of sewing experience], I think they turned out pretty well. I put it off for a long time, but since the mask era is most likely here to stay for a while and I can’t keep my kids at home forever, I finally got it done.

😷

Anyway, I primarily wanted to let you know that I will not be posting very frequently for a little while as I transition into my new jobs [one of them is from 3-9am] and plan for homeschooling [which I intend to start mid August].

I still need to post my Q2 book reviews [I read some AMAZING books] and a series of simplicity parenting posts and a motherhood post about STRESS.

😜

I hope you and all of your loved ones are healthy and well and enjoying this summer – despite everything that is happening around the world.

☀️ ☀️ ☀️

Karis

The Story of My Worn-Out Boots

The Story of My Worn-Out Boots

While the coronavirus pandemic has made some aspects of zero waste living more challenging [such as refusing plastic bags, shopping from bulk bins, filling reusable cups, and the war on disposable plastics in general], there are some aspects of low waste living that are becoming more popular as a result of this unprecedented time [such as unpaper towels, cloth diapering, baking from scratch, sewing, and gardening].

Well, there is one more low waste principle I would like to recommend as being ideal in this situation: repairing our stuff rather than throwing it away and buying new. Since shopping malls are closed now and a lot of “retail therapy” has been exchanged for outdoor exercise [👍🏻👍🏻👍🏻], you might be forced to make do with what you have in your closet anyway.

Of course, there is always Amazon [and other online retailers] to order from, but why not give mending a chance? Especially at a time when everyone at least appears to be extremely concerned about their finances, now would be ideal to practice all those forgotten resolutions of not buying a bunch of crap we don’t need.

So, along those lines, here is my story of repairing rather than replacing.

[Don’t worry – it’s a short story.]

The Story

Before the stay-at-home order went into effect for Illinois [which was one of the earliest states to go into lockdown], I decided to have one of my boots repaired rather than throwing the pair away.

These boots are nothing special. They aren’t fancy. They didn’t cost very much money. But they are my only pair of black flat boots and I have worn them all fall and winter for the past five years. So when the sole ripped apart from the rest of the boot, I was bummed.

Brett immediately suggested throwing them in the trash – even offering to do the job for me since he knows it pains me to throw anything away [what a guy]. But I told him I would see about getting them repaired. Of course he laughed at this and told me that it would cost more to fix the boot than it would to buy a new pair.

Still, I liked these boots and I didn’t want to buy a new pair. I have developed a very strong aversion to new things as it is. Add to that my dislike of throwing things away and I knew I had to at least attempt to get them repaired.

I found a cobbler. [It took a while for me to even remember what the term is for someone who repairs shoes, my only knowledge of them coming from the old story about the elves and the cobbler…oh and the Adam Sandler movie.]

I have never been to a shoe repair shop. I had absolutely no frame of reference for what this might cost. They could have told me it would cost $75 and I wouldn’t have known if this was highway robbery or if shoe repair really is that challenging of a job. But when I told the man the problem, he said he could glue the sole back on for $10.

Ten dollars! What a steal!

I dropped the boot off that day and picked it up the following week, good as new. [Not really, it is still a worn-out boot, but at least there isn’t a huge hole at the heel anymore.] I am confident that I will get at least several more years out of these boots, and in the very likely event that another part wears out, I will return to the same repairman again.

So there you have it. These poor, innocent little boots would have been rotting in some landfill by now if the kind shoe repairman hadn’t fixed them for $10!

[Also, I don’t think I could buy a pair of new boots for $10 – so there Brett!]

The Moral of the Story

Our society has been trained to believe that everything is disposable – even our clothing and shoes. Oh, those pants don’t fit just right? That zipper is broken? The heel snapped off your shoe? There is a stain on your sweater? There is a hole in your jeans? Missing a button??? Well then, just toss it in the garbage bin and *POOF* it magically disappears and you can go buy another one [or two or three] at any time.

The problem is that clothing and shoes are NOT disposable. They are not meant to be treated like tissues, used once and then thrown away. Clothing has a very high price – in natural resources, in skilled labor, in transport and energy. And we keep churning it out and tossing it away like there is no end in sight.

Unfortunately, the end is coming. The clothing industry [as far as it stands in America] is not sustainable, and I’m not even talking about environmental sustainability. I just mean that it literally cannot go on like this. The model takes too much and abuses too many and creates an exorbitant amount of waste.

Even donated clothing has become a huge problem for non-profits and [even worse] impoverished communities to deal with now.

Do we really believe that we can keep creating and buying and discarding textiles to the tune of over 15 million tons of waste per year? Without something breaking eventually?

So, honestly, I hope that America makes a shift from buying cheap, crappy clothing on repeat and instead repairs and mends and tailors and darns and modifies and, heck, if all else fails, repurposes what they already have.

And I’m not saying this as someone who doesn’t have substantial skin in the game. My partner has been selling clothing for the past ten years. Our family’s primary source of income is clothing retail. But especially as someone who has seen the background of these businesses, I can promise you that the whole machine has been slowly grinding to a halt even before this pandemic. Big name clothing brands are shutting down stores, filing bankruptcy, continually missing sales projections, clearancing surplus stock just to get rid of it so that they can make room for the new collections that are coming in every month [or more frequently]. By dropping their prices, stores are training customers to wait for low prices, which creates a cyclical effect that is basically a death spiral for the clothing retailer.

This has been coming long before the coronavirus existed.

Anyway, how great would it be if we could trade fast fashion retailers for, say, a booming seamstress and tailoring industry? Or make thrift shopping the primary source of clothing rather than the shopping malls [which have also been on the decline for years now], so that resale shops around the country have to hire tons more employees and move to bigger locations to meet the demand? And what if cobblers become so common that everyone knows where their local shoe repair shop is, rather than wondering where to even find such a thing? And maybe people will start getting creative and turning their old clothes into new, unique one-of-a-kind pieces that they truly love, rather than having to search through racks of the same pants that fifty other people will buy that same day?

Sounds good to me.

Don’t worry – the clothing industry will never go away completely. We obviously will always need clothes. But imagine a world where we only buy what we need, then we would have money to pay more and we would buy better quality and clothing manufacturers wouldn’t have to be constantly cutting their costs to appease the American demand for cheaper and cheaper clothing. This would be a win for everyone.

For more information on the clothing industry, I highly recommend the following:

  • Overdressed by Elizabeth L. Cline
  • Wardrobe Crisis by Clare Press
  • The True Cost [Documentary]

Happy mending!

👢👢👢

Karis

[Nearly] Zero Waste Valentine’s Day Coloring Bookmarks

[Nearly] Zero Waste Valentine’s Day Coloring Bookmarks

Last year was my first time dealing with a school Valentine’s Day exchange in probably twenty years. And let me tell you, A LOT has changed since I used to tear apart those cheap perforated cards with looney toons characters and obsess over which cute boys got the most romantic messages. Fast forward to today and the expectations for this holiday seems to have skyrocketed. [Well done, Hallmark]

As you might expect, cutting down on the wastefulness of the event is my main priority. Last year, Evangeline took these cuties to her class to give out.

This year, we went with a non-edible option: color your own bookmark.

I printed these bookmarks [free from Inspiration Made Simple – thank you!] and attached them to colored card stock then taped a crayon to the back.

This option was perfect for Evangeline because she LOVES reading and she actually uses bookmarks because she is already reading chapter books [WHAT?!?]. She also LOVES coloring. Of course, she wanted to color them in, so I let her color one for her teacher and attached it to a jar of chocolate we got from the bulk bins.

Besides avoiding waste, I also like to use what I have on hand. Since we already had an unused box of crayons and plenty of paper, this project didn’t require going out to buy anything.

Though a lot has changed, kids still apparently decorate boxes for their valentines. I may have had a little too much fun helping Evangeline with hers.

It turned out cute – and distinctly Evangeline.

[I found more great ideas for zero waste Valentine’s gifts for the obligatory classroom exchange on Zeroish.org – read the list here!]

I hope everyone has a lovely [nearly] zero waste Valentine’s Day!

❤️ ❤️ ❤️

Karis

Homemade [Low Sugar, No Pectin] Strawberry Jam

Homemade [Low Sugar, No Pectin] Strawberry Jam

Two years ago, I read a small sidebar – maybe three or four sentences – in Martha Stewart Living Magazine about how she makes a pectin-free strawberry jam. It sounded so simple that I immediately bought some strawberries and gave it a try. I’ve been happily making my own jam ever since.

[Thanks, Martha!]

Since then, I’ve experimented with reducing the sugar and adjusting the steps to suit my time constraints and personal preferences until I can now say that I have created an even simpler and healthier way of making strawberry jam!

[Sorry, Martha, it’s true.]

So, here’s all you need to do.

1. Hull and rinse strawberries. [I usually quarter them, but that is not necessary.]

2. Put berries in a big bowl and mix with half a cup of sugar per one pound of strawberries [Martha’s recipe called for double the sugar] and juice of one lemon.

Side note: I’ve tried even less sugar and even no sugar recipes but the jam always tastes really tart and doesn’t thicken the way this version does.

3. Cover and refrigerate overnight. [Martha never specified how many hours to refrigerate them so I just make the jam sometime the next day.]

4. Heat on the stove in a big stock pot until sugar is dissolved. This doesn’t take long – maybe 10 minutes.

5. Remove the berries and boil the remaining juice until it reaches 221°. This takes longer – maybe 40 minutes to one hour, depending on how much jam you are making.

6. Blend [or mash] berries and add back to the juice. [You could also leave the strawberries whole.] Boil for five more minutes.

7. Pour into sterilized jars. Let cool on the counter then refrigerate or freeze.

The jam thickens as it cools and even more once it’s in the fridge, but it never gets as thick as a jam made with pectin. Still, it works perfectly for PBJ or as a sauce for dessert [like cheesecake or angel food cake or vanilla ice cream] or a topping for toast.

To keep the cost down, I only make jam when strawberries are on sale. Today, I used seven pounds of strawberries and three cups of sugar and made roughly two quarts of jam – for about $7.

I’m not sure if that’s a savings, but it is zero waste AND zero high fructose corn syrup!

So, that’s a win in my book.

🍓 🍓 🍓

Karis

Homemade croutons

Homemade croutons

When I’m reaching the end of my homemade bread loaves, I usually have some dried ends hanging around because of the shape of my loaf pans. Rather than let these go to waste, I use them to make croutons.

I originally got the idea from back in the day when I worked for Panera. Did you know that they make their own croutons out of their freshly baked bread? Well, at least that’s how they did it ten years ago…

Anyway, nowadays I do the same thing when I’m looking for ways to use the bread before it goes bad.

It’s SO simple and a great zero waste option if you love croutons as much as I do.

How to make your own croutons:

  1. Cube the bread.
  2. Add enough oil and seasonings to coat lightly. [I use the same seasoning mix I use for my homemade salad dressing here, or you could use regular Italian seasoning.]
  3. Spread on a baking sheet and bake at 450° for roughly 8 minutes, shaking the tray once to stir. [Time will depend on how dry the bread is to begin with, so watch closely.]
  4. Enjoy in soups or salads or, as my kids like to have them, as a crunchy snack.

For dinner tonight I had day old bread that needed to be used up, so I made grilled cheese sandwiches and used the ends of the loaf to make these croutons to top squash soup which my Auntie Paula had given us.

Mmm-mmm. Delicious.

Karis

My Favorite DIY Salad Dressing

My Favorite DIY Salad Dressing

One of my secrets for getting lots of fresh vegetables in my diet is to eat a salad every day for lunch. I make the salad and dressing myself – prepping and packing it to go when necessary.

Salads are a very healthy choice, but salad dressings are usually full of calories, sodium, added sugars, and saturated fat. In fact, ordering a salad at a restaurant is usually not going to be the healthiest option on the menu, despite what you would assume.

So, I’ve been creating my own salad dressings to avoid unhealthy store-bought varieties. For a time, I would premix a vinaigrette of sorts, but I got lazy and wanted something I didn’t actually have to make ahead. Now, I create my salad dressing right in the bowl with the following ingredients:

  • Extra virgin olive oil
  • Italian dressing seasoning mix (homemade according to this recipe by The Midnight Baker)
  • Lemon juice (freshly squeezed, when possible)

You could use the Italian dressing mix to – duh – make Italian dressing, but this stuff is DELICIOUS as just a plain seasoning. I originally found the recipe in order to marinate some chicken. The chicken turned out delicious and the dressing really tasted like Italian; however, I wanted to just mix my dressing in my bowl with a few ingredients I always have on hand.

I essentially make the dressing, but in my bowl – and I use lemon juice instead of vinegar because it’s a more natural option and adds a more summery, citrus flavor. I just cut a lemon in half and squeeze a little juice right into the bowl.

This salad dressing tastes like summer. I’m not kidding.

Then I get creative with my toppings.

Other toppings I frequently add: almonds, capers, olives, peppers, cucumbers, etc

Don’t let your salad get boring!

And don’t let your salad dressing derail your healthy eating habits!

Share your fave DIY dressing below!

🥗 🥗 🥗

Karis

[Nearly] Zero Waste Cutie Valentine’s Day Gifts

[Nearly] Zero Waste Cutie Valentine’s Day Gifts

Now that my oldest is in preschool, I get to prepare the obligatory Valentine’s Day gifts for my daughter to distribute to her classmates. As an avid Pinterest user and someone who loves all things crafty, I’ve been looking forward to this day, imagining all the cute, clever homemade card possibilities. However, I had the added challenge of finding something eco-friendly and plastic free and not candy and not wasteful and not crap that the other parents are just going to throw out and not wrapped in a plastic bag and [hopefully] not requiring me to go to the store and spend any money at all.

My solution: the cutie.

I did have to buy the cuties, but they happened to be on sale this week at my grocer and I had everything else at home – which was very important because, even though I was looking forward to this occasion, it snuck up on me, and yesterday I found myself scrambling to put together seventeen preschool Valentine’s Day gifts.

I didn’t want to wrap them in plastic bags, so I carefully tied them with string and put a cute little card to the top that I printed on green card stock. [Thank you, prettyprovidence.com for the free printable!]

My daughter drew hearts and her name on the back of each leaf. And since cuties are her favorite snack, she was very excited to give these to her classmates.

What I love most is that every part of this Valentine’s Day gift is either edible or compostable. I have no idea how many other families compost – but at least I know I have done my part.

[Update: other zero waste valentines that my kids have distributed at school are:

[Nearly] Zero Waste Valentine’s Day Coloring Bookmarks

[Nearly] Zero Waste Valentine’s Day Pencil Arrows]

Happy Valentine’s Day to you all!

❤️ ❤️ ❤️

Karis

Recycling [or Repurposing] Candle Jars

Recycling [or Repurposing] Candle Jars

Does anyone recycle their used candle jars? I’m not judging – I’m just seriously wondering because I don’t think I’ve ever actually burned through an entire candle until just recently [thanks to my recent hygge kick, you may recall]. I feel like candles are things that every person has a million of and most of them are never [or rarely] used.

Maybe that’s just me.

I don’t remember ever finishing a candle, but I am certain that if I ever did, the jar ended up in the trash because, well, everything I disposed of ended up in the trash in those days. [I’m new to this recycling thing, don’t forget.]

So, now that I have several candles that have been fully burned, I had to figure out what to do with the remaining jars.

First I had to clean them out, which I accomplished by filling with hot water and scraping out the remaining wax with a spoon. Only one candle cooperated.

Folks, this is apparently not the best way to clean your candle jars. I was just trying to use my brain when I should have been asking Google. Apparently, all you need to do is stick the candle in the freezer and the wax will magically separate from the container. [Whaaa?] I cannot verify this, of course, but it sounds much easier than my scraping method.

So now, what?

I have seen a million ways to repurpose candle jars on Pinterest. They can hold cotton swabs, makeup brushes, plants, tea lights, herbs, buttons, candy, rubber bands, and on and on. Basically they can hold anything that will fit [duh]. The problem is, I don’t need another glass jar lying around holding more of the little stuff I don’t want in my house anyway!

So I figured I would just recycle the glass jars. Off to the recycling bin and that is that. After all, we burn a lot of candles these days and if I kept every jar, we would eventually be overrun with empty jars.

That’s when it hit me. The best way to reuse the old jars is to refill with wax and make new candles. After all, WE BURN A LOT OF CANDLES! [This should not have been such a revelation. I am admittedly slow sometimes.] Pinterest was actually a little low on recommendations for refilling candle jars with [wait for it…] new candles! But maybe that is just too obvious for anyone else to even burden the interwebs with.

All I will need is the wax [some of which I can reuse from the bottom of old jars] and I won’t need to buy candles any longer. This provides me with the opportunity to switch over to 100% beeswax candles AND reduce waste AND cut down the cost of our candle habit.

I immediately rescued the empty jars from the recycling bin outside and refilled the little one that I like the best with leftover wax melts we have had in our basement for ages. [Now I finally understand why providence never let me get rid of those…]

Voila! New candle cooling down as we speak. [Yeah, I used a beeswax candle to hold the wick – it’s what I had handy.]

I should also mention that I found conflicting info regarding whether candle jars can be recycled curbside due to some of the containers being made to withstand high heat and therefore not your basic run o’ the mill glass. If you are certain that are glass, then go for it, but if they might be made of borosilicate [I have not the foggiest idea how one is supposed to tell the difference…], it can’t be recycled curbside and you’ll have to scour the Internet for a local recycling center.

This is a fabulous argument for just reusing. If you have a need for a cutesy q-tip holder – then go for it. Otherwise, refill with some beeswax [don’t forget a wick], and you’re all set for clear-conscience candle consumption!

[Well, unless we start talking about indoor air pollution…oy vey!]

🕯 🕯 🕯

Karis

Carlson Countdown to Christmas 2018: Dec 2

Carlson Countdown to Christmas 2018: Dec 2

Today, the kids and I made Danish woven heart ornaments to send to their cousins and friends with their Christmas cards.

This past summer, I read a wonderful book called The Little Book of Hygge by Meik Wiking.

[By the end of this short book, I had fallen in love with Scandinavian culture.]

In the book, I found this handy guide for making paper woven hearts, which is a Christmas tradition in Denmark:

I knew the moment I read about this simple and beautiful Danish tradition, that we would have to make them as one of our 25 Days of Christmas Activities.

They were tough for my 2 and 4-year-olds to do alone, but they did surprisingly well once they learned the pattern.

We made a bunch.

I’m sure they don’t look as good as the ones in Denmark, but I’m proud of our first attempt.

Then, to keep with the Danish theme, we baked Danish butter cookies to take to Brett’s work tomorrow – but between Brett and the kids, they won’t make it to tomorrow.

Karis